
Scuffs and scratch lines along one side of a metallic blue Saab convertible, repainted and polished.
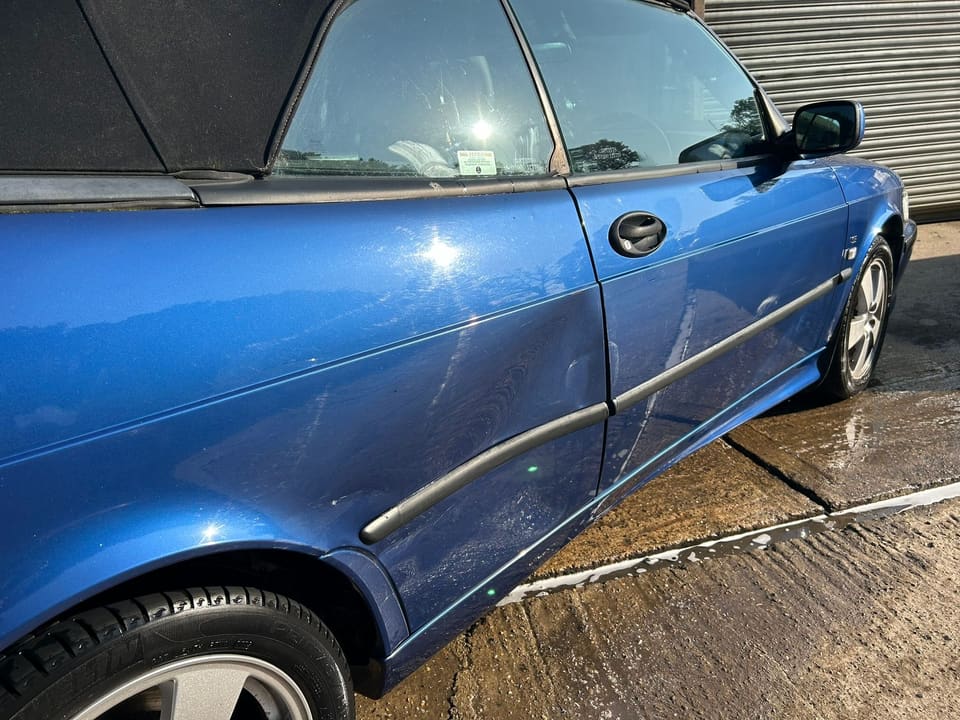
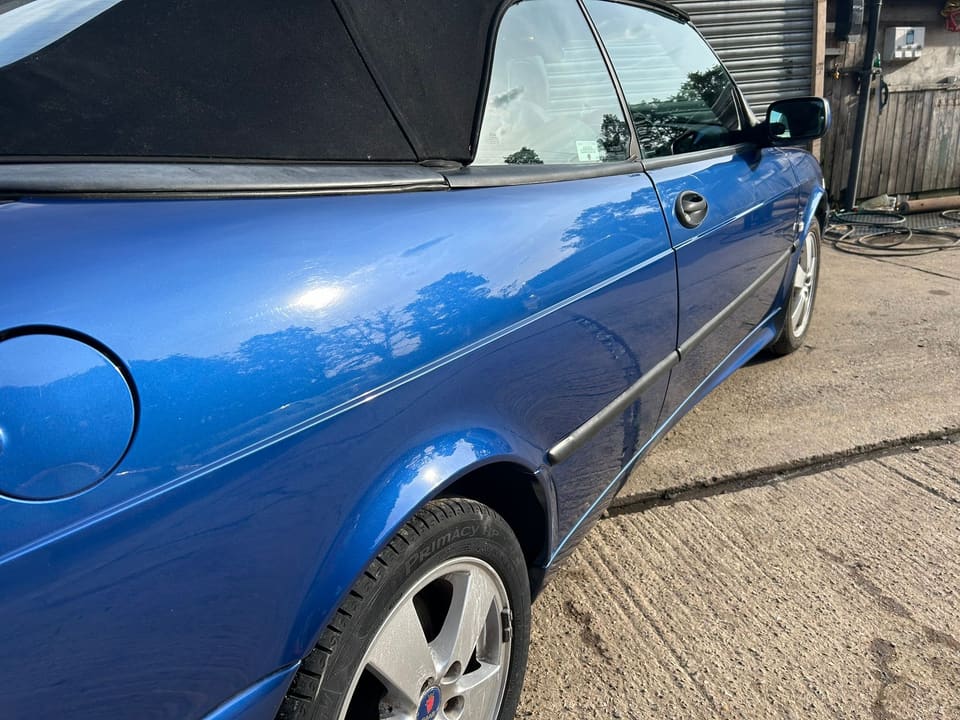
A Saab 9-3 Convertible in metallic blue looks very good when the paint is right. This one came in after the owner had scuffed the whole passenger side against something firm.
What was wrong with it?
The front wing, doors and rear quarter had deep scratch lines along the lower swage line, and there was a scrape across the rear arch. In the sun the damage showed up as dull paint and broken reflections. Polish alone was never going to fix it.
The damage was mostly in the paint, deep into the lacquer in places. The panels were not dented, the body line was true and there was no rust underneath. That meant no pulling, filling or replacing panels. It was a paintwork job.
The colour was the hard part. Metallic blue shifts in the light, and fifteen years of UK weather had faded this car a little. If the new paint is a touch off, you get a halo round the repair. And because the scuffs ran across two panels, we had to match and blend at a clean boundary on each side.
What did we do?
- Assess and mask. We washed the car and looked over the damage in good light. Scratches deep enough to catch a fingernail were marked. The soft top, glass, trim and neighbouring panels were masked.
- Prepare the surface. Each damaged panel was sanded back through the damaged lacquer, and into the colour where needed, to leave a clean, level base.
- Match the colour. We read the existing paint on the car and mixed a match to it. A tin mixed to the original code would have been visibly off on a car this age.
- Spray. The paint went on in our spray booth, base coat first and then lacquer, with proper time between coats.
- Blend and polish. When the paint had cured it was wet-sanded and machine polished. That is also where the line between new and old paint disappears.
How did it turn out?
In the after photo, the trees reflect in the panel. The blue is even along the whole side, the swage line catches the light cleanly and you cannot see where the repair starts. The job took a few working days including curing time, and the owner collected the car that week.
If your car has scuffs or scratches, send us photos. See our scratch and scuff repair page, read respray or repair, or see more work in the gallery.